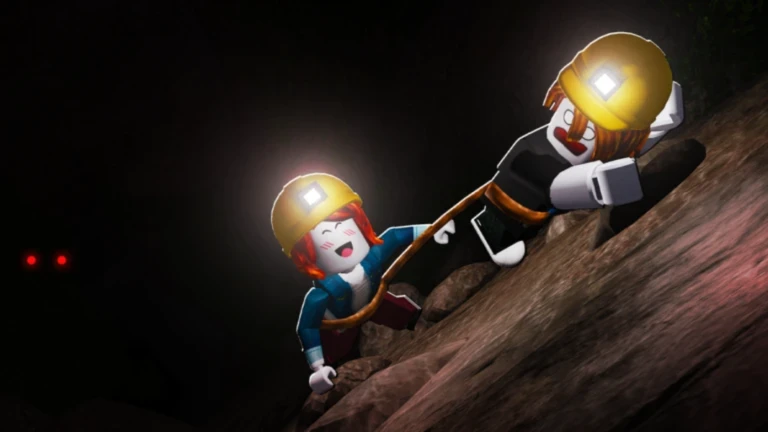
- Escape the Cave is a Roblox mining-and-escape game about gathering resources and reaching the tunnel exit
- Core loop: mine rocks, sell materials, buy upgrades, then push deeper into the cave
- Best start: pick a balanced miner class and upgrade pickaxe plus backpack first
- Currency rule: treat Cash as everyday spending and save Gems for long-term progression
- Hard mode: only attempt it after your equipment covers your team's weakest point
What Escape the Cave on Roblox Is About
Escape the Cave on Roblox blends mining, resource management, and cooperative escape gameplay into one progression loop. You enter a dark tunnel, break rocks for materials, haul them back to sell, and reinvest your earnings into better tools. The long-term goal is twofold: build a mining setup strong enough to survive deeper sections, and eventually complete the escape by reaching the end of the tunnel.
Progression depends on balancing four systems that all pull on the same currency pool:
| System | What It Does | Why It Matters |
|---|---|---|
| Mining power | Breaks rocks faster | Unlocks access to harder, more valuable deposits |
| Carrying capacity | Holds more per trip | Fewer return visits, higher income per run |
| Mobility | Cars and travel upgrades | Cuts downtime on longer routes |
| Survival gear | Supports risky sections | Determines whether Hard mode runs finish at all |
Learn the mining area first. Prioritize deposits close to the selling zone so you can build your upgrade budget without wasting travel time on long detours.
The game also features an Easy and Hard mode split, a pet system with passive bonuses, and optional secrets hidden off the main route. Each of these systems rewards a different style of preparation, which the sections below break down in detail.
Beginner Progression: Step by Step
New players fail most often because they spend currency on the wrong upgrade at the wrong time. Follow this order and every run funds the next improvement instead of stalling your progression.
Start Mining Rocks
Use your starting equipment to break nearby rocks and collect resources. Focus on deposits you can reach quickly while you learn the layout of the mining area.
Return and Sell Resources
Bring materials back to the selling area and convert them into Cash. Sell regularly so a full backpack never blocks your next mining trip.
Buy Early Upgrades
Reinvest earnings into mining power, backpack capacity, and basic mobility. Pickaxe and backpack upgrades give the clearest early returns.
Extend Your Mining Route
Once your equipment improves, push farther into the cave and target more valuable deposits. Do not enter areas where your current gear is inefficient.
Progress Toward the Exit
Balance mining speed, storage, and transportation as you advance. Keep enough time and resources for the final escape sequence.
Avoid dumping all of your currency into one expensive upgrade. If mining power surges ahead of your backpack and mobility, every run still gets bottlenecked by the weakest system in your setup.
Classes and Tools Compared
Your class choice defines your role in a run, and your tool purchases determine how efficiently that role performs. Use the rankings below to match a class to your goal, then buy upgrades that reinforce it.
Class Tier Rankings
| Tier | Role | Strengths | Best For |
|---|---|---|---|
| S | Balanced Progression Miner | Reliable learning curve, supports mining and movement | Beginners and flexible all-purpose runs |
| A | Resource Farming Miner | Strong repeated trips, fast currency building | Players funding equipment upgrades quickly |
| A | Speed Miner | Reduces travel downtime, reaches deeper areas faster | Experienced players who know efficient routes |
| B | Difficult-Run Specialist | Rewards careful planning and consistency | Veterans attempting demanding Hard mode runs |
Upgrade Purchase Guide
| Upgrade | Function | Best Time to Buy | Value |
|---|---|---|---|
| Pickaxes | Faster rock breaking | When common rocks take too long to mine | High early-game |
| Backpacks | More carrying capacity | Whenever your pack fills mid-route | High consistent |
| Drills | Sustained advanced mining | Once income is stable and speed is the limit | High mid-game |
| Cars | Faster transportation | When travel time dominates each run | High for long runs |
| Dynamite | Clears tough obstacles | Only when explosives save significant time | Situational |
Balanced Start
- Pickaxe first, backpack second
- Steady income per trip
- Works with the S-tier class
Farming Focus
- Backpack priority
- Repeatable short routes
- Pairs with resource farming miner
Deep-Run Setup
- Car plus drill
- Targets distant deposits
- Suits speed miner builds
Always upgrade the part of your setup causing the most downtime. Mining upgrades fix slow collection, mobility fixes wasted travel, and storage fixes constant returns. Fix the bottleneck, not the price tag.
Gems, Cash, and Pets
Cash and Gems serve different purposes, and treating them the same way slows progression. Cash is your everyday upgrade currency earned through consistent completed runs. Gems are rarer and belong in long-term progression purchases that stay useful across many runs.
| Currency | How to Earn | Best Use | Rule of Thumb |
|---|---|---|---|
| Cash | Consistent completed runs, moderate collection | Everyday upgrades and tools | A completed safe run beats a failed ambitious one |
| Gems | Less common, found through exploration and runs | Premium progression unlocks | Compare against your bottleneck before spending |
Pets add passive bonuses on top of your gear. Match the pet to the objective rather than always equipping the newest one:
- Mining-focused pets speed up deposit breaking. Equip them when mining time, not survival, limits your route.
- Resource-collection pets boost gathered resources. Best on routes with many reachable side deposits.
- Solo players benefit from an all-purpose pet since one character handles everything.
- Cooperative teams should split roles so bonuses complement instead of overlap.
Assign resource areas before entering, announce when moving deeper, and regroup before risky sections or the final escape. Communication prevents two players mining the same deposit while another section goes untouched.
Easy vs Hard Mode and the Ending
Both modes share the same objective, but Hard mode punishes improvised play. Use Easy mode to learn map flow, test upgrades, and build a currency reserve before committing to repeated Hard mode attempts.
| Category | Easy Mode | Hard Mode |
|---|---|---|
| Difficulty | Forgiving, good for practice | Demanding on timing and coordination |
| Rewards | Stable, dependable income | Higher payoff, but failed runs waste time |
| Equipment | Basic gear is fine | Upgrade your weakest point first |
| Class choice | Flexible, experimental | Complementary team roles |
| Preparation | Learn the route and exit path | Planned route, regroup point, suitable pets |
Reaching the main ending is straightforward in principle: follow the primary tunnel route, keep enough time and resources for the final escape, and prioritize completion over optional exploration. The optional content, including hidden Diamonds, secret areas, and additional characters, rewards players who return with dedicated exploration runs rather than risking a first completion.
A practical completionist route splits the work across separate runs:
- Run one: learn the route and complete the main ending
- Run two: collect nearby hidden Diamonds and side passages
- Run three: investigate secret areas and unexplored branches
- Final pass: confirm optional characters and discoveries on the safest difficulty
Before a Hard Mode Run:
- Upgrade the team's weakest system
- Plan the route and set a regroup point
- Equip pets that complement team roles
- Confirm enough experience to know when to retreat
In Hard mode, stay together during dangerous sections and skip marginal detours. A repeated successful completion is worth more than one extra deposit that risks the whole run.
FAQ
Q: What is Escape the Cave on Roblox about?
Escape the Cave is a Roblox mining-and-escape game where you break rocks, collect resources, sell materials for Cash and Gems, buy upgrades like pickaxes and backpacks, and progress through the cave toward the tunnel exit.
Q: Which class should beginners pick?
The S-tier Balanced Progression Miner is the best starting choice. It supports both mining and movement, works well across general progression, and stays useful while you learn cave routes and upgrade priorities.
Q: What should I upgrade first?
A stronger pickaxe is one of the clearest first investments for faster mining, followed closely by backpack capacity. Larger storage reduces return trips and pairs well with mining-power upgrades.
Q: When should I try Hard mode?
Attempt Hard mode only after building a currency reserve in Easy mode, upgrading the team's weakest system, and planning a route with a clear regroup point. Treat every Hard mode attempt as a planned expedition, not an improvised farming run.