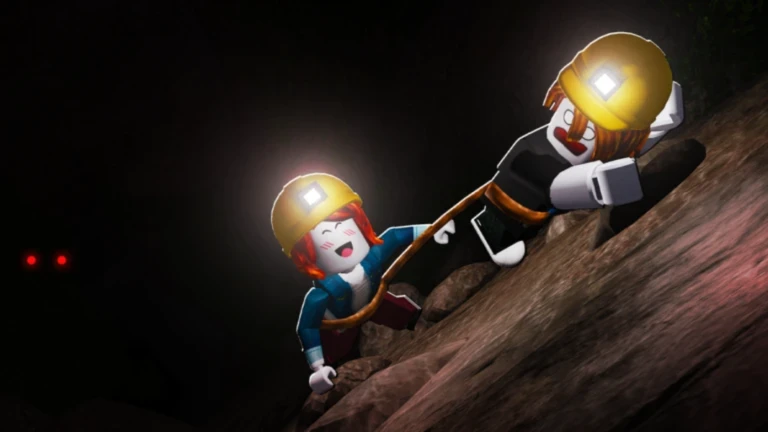
- Best overall class: The balanced Progression Miner is the safest Escape the Cave best class pick for new players.
- For farming: Choose a Resource Farming Miner when currency income is your priority.
- For speed runs: The Speed Miner shines once you know the cave routes.
- For Hard mode: Pick a Difficult-Run Specialist only after upgrading your core equipment.
- Solo rule: Favor all-round utility; in groups, avoid stacking the same class.
Escape the Cave Best Class Tier List
Choosing the best class in Escape the Cave depends entirely on what you want out of each run. The game's core loop — mining rocks, selling resources, buying upgrades, and pushing deeper toward the exit — rewards different classes at different stages of progression. A class that carries your first hour may feel weak once your backpack and pickaxe are upgraded.
The tier list below ranks the four main class roles by overall usefulness across Easy mode, Hard mode, farming sessions, and speed attempts.
| Tier | Class Role | Best At | Recommended For |
|---|---|---|---|
| S | Balanced Progression Miner | Learning routes, steady mining, general progression | Beginners and flexible players |
| A | Resource Farming Miner | Repeated mining trips, currency income | Players funding equipment upgrades |
| A | Speed Miner | Fast traversal, deeper areas, low downtime | Experienced route-runners |
| B | Difficult-Run Specialist | Surviving demanding Hard mode attempts | Well-equipped veteran players |
Tiers reflect usefulness relative to your progression stage, not raw power. A B-tier specialist can outperform an S-tier pick on a fully prepared Hard mode team, and an A-tier farmer earns currency faster than anything else early on. Match the class to your current bottleneck.
Class Comparison: Strengths and Weaknesses
Every class role in Escape the Cave trades something for its specialty. Understanding those trade-offs prevents you from picking a class that fights against your upgrade path.
Balanced Progression Miner (S-Tier)
- Reliable for learning the game
- Supports both mining and movement
- Works well across general progression
- Weakness: never the absolute best at any one job
Resource Farming Miner (A-Tier)
- Strong for repeated mining trips
- Prioritizes resource collection
- Funds equipment upgrades quickly
- Weakness: slower traversal between deposits
Speed Miner (A-Tier)
- Improves movement-focused runs
- Reduces travel downtime
- Reaches deeper areas faster
- Weakness: wasted potential if you don't know efficient routes
Difficult-Run Specialist (B-Tier)
- Built for challenging Hard mode runs
- Rewards careful planning and consistency
- Weakness: low farming speed before your equipment base is strong
The table below breaks down where each class performs best by game mode and situation:
| Situation | Best Class | Why It Wins |
|---|---|---|
| First-ever run | Balanced Progression Miner | Forgiving, teaches mining and movement together |
| Currency grinding | Resource Farming Miner | Maximizes resources collected per trip |
| Reaching the exit fast | Speed Miner | Cuts travel time on known routes |
| Hard mode attempts | Difficult-Run Specialist | Consistency and survival matter more than speed |
| Solo play | Balanced Progression Miner | One class covers mining, movement, and safety |
| Cooperative teams | Mixed roles | Complementary classes beat stacked duplicates |
Do not pick the Difficult-Run Specialist as your first class. Its strengths only pay off after you own upgraded equipment and know the tunnel layout. Starting with it usually slows your early economy and delays every future upgrade.
Step-by-Step: Choosing and Building Your Class
Follow this sequence to pick the right class and grow into stronger specializations without wasting resources.
Start With the Balanced Miner
Begin with the Balanced Progression Miner. Use your first sessions to learn the cave layout, identify nearby deposits, and understand the sell-and-upgrade loop before specializing.
Identify Your Bottleneck
Watch your runs closely. If mining takes too long, you need farming power. If travel eats your time, you need speed. Your bottleneck should drive your next class choice.
Switch to a Farming Build
Once you know the routes, move to the Resource Farming Miner to build currency. Prioritize a stronger pickaxe and a larger backpack to raise the value of every trip.
Add Mobility for Deeper Runs
When your routes extend deeper into the cave, the Speed Miner reduces downtime. Buy transportation upgrades such as cars when travel becomes a major part of each run.
Specialize for Hard Mode
After establishing a strong equipment base, use the Difficult-Run Specialist for Hard mode attempts with a planned route, regroup points, and suitable pets.
Players who follow this order typically reach Hard mode readiness faster because every class phase directly funds the next upgrade tier. Reinvest earnings instead of hoarding currency between phases.
Class Setup by Game Mode and Equipment Stage
Class value changes with both difficulty mode and your current equipment. The tables below pair each stage of progression with the smartest class and upgrade priorities.
| Progression Stage | Recommended Class | Priority Upgrades |
|---|---|---|
| Brand new | Balanced Progression Miner | Pickaxe, basic backpack |
| Early farming | Resource Farming Miner | Backpack capacity, mining power |
| Mid game | Speed Miner | Cars, movement, drill |
| Late game | Difficult-Run Specialist | Full upgraded loadout, pets |
| Mode | Class Flexibility | Team Advice |
|---|---|---|
| Easy | Flexible, experiment freely | Any mix works while learning |
| Hard | Complementary strengths required | Cover mining, exploration, and survival |
On Hard mode, mistakes cost more and inefficient routes can end the run before the exit. Treat every Hard mode attempt as a planned expedition: enter with a route in mind, a clear regroup point, and the discipline to prioritize completion over marginal extra resources.
In group runs, assign roles before entering the cave. Multiple players using the same class overlap bonuses while other needs go uncovered. A mixed team of farmer, speed, and specialist classes handles every section of the tunnel more reliably.
Class Goals Checklist
Track your class progression with these milestones before committing to Hard mode specialization:
Before Specializing, Complete These:
- Learn the full main tunnel route on Easy mode
- Upgrade pickaxe and backpack with farming income
- Complete one full escape run without failures
- Test a Speed Miner build on a known route
- Build a currency reserve for Hard mode equipment
The best class answer changes as your equipment improves. Re-evaluate your bottleneck every few hours of play — the class that got you here is rarely the class that carries you to the exit.
FAQ
Q: What is the best class in Escape the Cave for beginners?
The Balanced Progression Miner is the best starting class. It supports both mining and movement, which lets new players learn cave routes, upgrade priorities, and the sell-and-upgrade loop without a specialized weakness.
Q: Which class earns currency fastest?
The Resource Farming Miner collects the most resources per trip, making it the strongest class for building currency quickly. Pair it with backpack capacity upgrades to reduce return trips to the selling area.
Q: When should I switch to a Difficult-Run Specialist?
Switch only after you have a strong equipment base, a planned Hard mode route, and enough experience to recognize when to retreat. Taking it too early slows your economy because its farming speed is low.
Q: Do class choices matter in Easy mode?
Less so. Easy mode is forgiving and allows experimentation with any class. It is the ideal place to test builds and learn routes before committing to specialized classes on Hard mode runs.