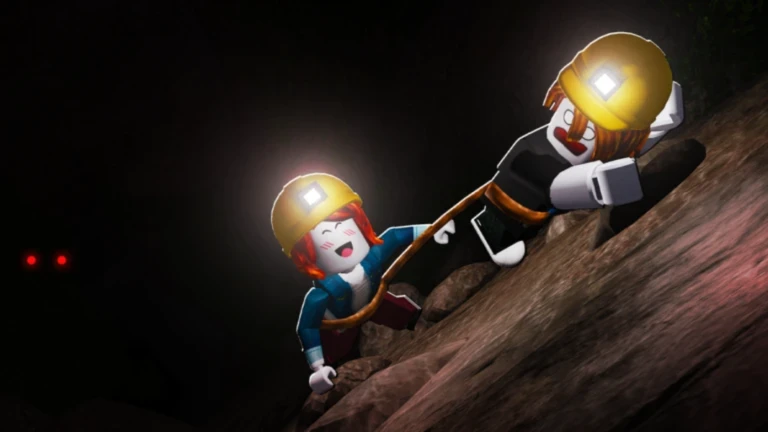
- Escape the Cave classes fall into four core roles: balanced, farming, speed, and hard-run specialists.
- Balanced Miner is the best starting class while you learn routes and upgrades.
- Farming Miner builds currency fastest through repeated resource trips.
- Speed Miner shines only after you know efficient cave routes.
- Switch to a difficult-run specialist once your equipment base is strong.
How Escape the Cave Classes Work
Class choice in Escape the Cave shapes how you mine, move, and survive inside the tunnel. The game's core loop—mining rocks, selling resources, buying upgrades, and pushing toward the exit—rewards classes that match your current bottleneck. A player limited by mining time needs a different role than one limited by travel speed or survival.
There are four practical class roles to understand before committing. Each supports a different progression style, and the strongest choice depends on whether you want faster progression, efficient farming, better mobility, or consistency on demanding runs.
Use a balanced class while learning the game, then specialize once you understand your preferred route and where each run actually loses time.
| Role | Focus | Peak Value | Skill Floor |
|---|---|---|---|
| Balanced Progression Miner | Mining plus movement | Early to mid game | Low |
| Resource Farming Miner | Currency and materials | Early to mid game | Low |
| Speed Miner | Travel and traversal | Mid to late game | Medium |
| Difficult-Run Specialist | Survival and planning | Late game / Hard mode | High |
Escape the Cave Classes Tier List
These rankings weigh early-game value, resource farming, movement speed, and performance on difficult runs. Treat tiers as guidance for your progression stage rather than fixed rankings—the same class can climb a tier once your equipment supports it.
| Tier | Class Role | Key Strengths | Best For |
|---|---|---|---|
| S | Balanced Progression Miner | Reliable learning curve, supports mining and movement, works across general progression | Beginners and players wanting one flexible class |
| A | Resource Farming Miner | Strong repeated trips, prioritizes collection, funds upgrades quickly | Players building currency fast |
| A | Speed Miner | Reduces travel downtime, reaches deeper areas faster | Experienced players with known routes |
| B | Difficult-Run Specialist | Rewards careful planning, built for challenging attempts | Veterans attempting Hard mode runs |
S-Tier: Balanced Progression Miner
- Reliable for learning the game
- Supports both mining and movement
- Works well across general progression
- Best overall starting option while learning routes
A-Tier: Resource Farming Miner
- Strong for repeated mining trips
- Prioritizes resource collection
- Useful for funding equipment upgrades
- Pick this when farming beats fast traversal
A-Tier: Speed Miner
- Improves movement-focused runs
- Reduces travel downtime
- Reaches deeper areas faster
- Most effective after learning cave layout
B-Tier: Difficult-Run Specialist
- Designed for challenging attempts
- Rewards careful planning
- Consistency over raw farming speed
- Use after building a strong equipment base
A specialist class cannot rescue weak equipment. Upgrade mining power, backpack capacity, and transportation before relying on a difficult-run or speed role for Hard mode.
Class Selection Step-by-Step
Follow this sequence to pick the right class for your progression stage. Each step prevents the most common mistake: choosing a role your equipment and route knowledge cannot support yet.
Start Balanced
Begin with the Balanced Progression Miner. It supports both mining and movement, letting you learn cave routes, upgrade priorities, and selling routines without a punishing weakness.
Identify Your Bottleneck
After several runs, check what limits you most: mining time, travel time, backpack capacity, or failed attempts. Your bottleneck should drive the next class choice.
Switch to Farming for Currency
If upgrades are the limit, switch to the Resource Farming Miner. Repeated collection trips fund pickaxes, drills, and backpacks faster than mixed-approach runs.
Add Speed After Route Mastery
Once you know efficient routes and deposit locations, the Speed Miner cuts travel downtime and opens deeper cave sections.
Specialize for Hard Mode
Prepare difficult runs with the specialist role, a planned route, a regroup point, and complementary pets. Treat every Hard mode attempt as a planned expedition.
Solo players should favor reliable all-round utility. Groups should avoid overlapping roles—cover mining, collection, and survival across the team instead of stacking the same class.
Classes by Mode and Objective
Class performance shifts between Easy and Hard mode. Easy mode allows experimentation; Hard mode punishes inefficient roles and poor preparation. This comparison shows which role fits each objective.
| Objective | Recommended Role | Easy Mode Notes | Hard Mode Notes |
|---|---|---|---|
| Learning the game | Balanced Miner | Flexible, forgiving, room to test | Viable but not optimal |
| Funding upgrades | Farming Miner | Stable income from consistent completions | Failed runs reduce efficiency |
| Fast deep runs | Speed Miner | Good for route practice | Needs survival support |
| Hard mode completion | Difficult-Run Specialist | Overkill for farming | Core pick for demanding runs |
| Cooperative teams | Mixed roles | Experiment freely | Complementary coverage is essential |
Hard mode offers stronger rewards for the increased risk, but a failed ambitious run earns less than a completed moderate one. Farm Easy mode until completions are consistent before committing specialist classes to Hard mode.
Class Setup Checklist
Before committing to a class-focused progression plan, confirm each of these milestones. They keep your role choice aligned with your actual equipment and route knowledge.
Class Progression Milestones:
- Complete first full escape with a balanced class
- Identify your current run bottleneck (mining, travel, storage, survival)
- Fund a pickaxe and backpack upgrade through farming runs
- Learn one repeatable route including side deposit locations
- Attempt a planned Hard mode run with complementary team roles
Class Tier List FAQ
Q: What is the best Escape the Cave class for beginners?
The Balanced Progression Miner is the strongest starting option. It supports both mining and movement, works across general progression, and remains reliable while you learn cave routes and upgrade priorities.
Q: When should I switch from a balanced class to a specialist?
Switch once you can identify your actual bottleneck. If upgrades are the limit, move to the Resource Farming Miner. If travel time dominates your runs and you know efficient routes, the Speed Miner becomes more effective.
Q: Is the Difficult-Run Specialist worth using in Easy mode?
Generally no. Easy mode is forgiving enough that flexible classes perform well, and the specialist's planning-focused strengths are underused. Save it for Hard mode attempts where survival and consistency matter.
Q: How should a team assign Escape the Cave classes?
Avoid overlapping the same role. Cover mining, collection, and survival with complementary classes, assign roles before entering, announce movement deeper into the cave, and regroup before risky sections or the final escape.