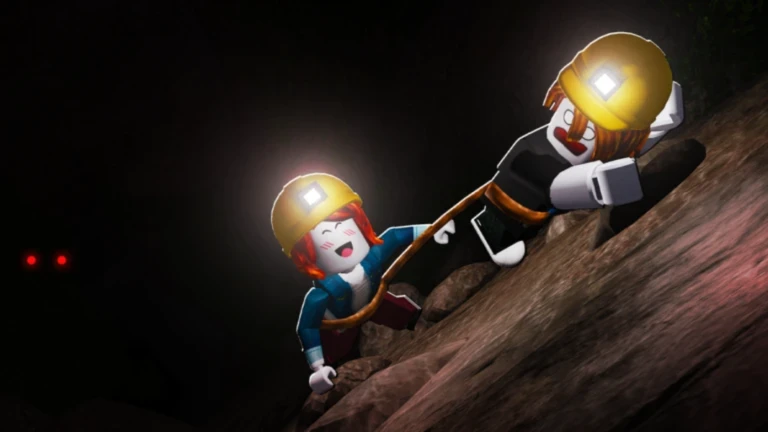
- Escape the Cave guide covers the full mining loop: break rocks, sell, upgrade, advance toward the exit.
- Core rule: upgrade your biggest bottleneck first instead of buying the most expensive item.
- Best start: pick a balanced miner class while learning routes, then specialize later.
- Currency tip: treat Cash as your everyday upgrade fund and save Gems for long-term progression.
- Hard mode: only attempt it after your equipment can finish runs consistently.
Core Gameplay Loop: How Escape the Cave Works
Escape the Cave revolves around a repeatable mining-and-escape cycle. You enter the tunnel, break rocks to collect resources, return to the selling area to convert them into currency, and reinvest those earnings into equipment. Each upgrade lets you travel deeper, mine tougher deposits, and carry more per trip, which slowly pushes you toward the cave exit and the main ending.
The loop sounds simple, but run efficiency is what separates fast progress from wasted trips. Every run has three costs: travel time, mining time, and return time. Your upgrades should always attack whichever of those three is currently the biggest drag on your income.
Mining Phase
- Break rocks with your current tool
- Prioritize nearby deposits first
- Learn the route while gathering
Selling Phase
- Return before your backpack fills
- Convert resources into Cash
- Sell regularly to avoid stalls
Upgrade Phase
- Reinvest in tools, storage, and transport
- Fix the weakest link in your run
- Advance deeper each cycle
Do not wait until your backpack is completely full to head back. Leaving a little spare capacity keeps your route flexible and prevents you from passing valuable deposits you cannot carry.
Step-by-Step Progression Walkthrough
Follow this sequence during your first few sessions. It builds income early, then converts that income into deeper exploration, and finally prepares you for longer escape runs.
Start Mining Nearby Rocks
Use your starting equipment on the closest deposits. The goal is not profit yet — it is learning the layout, controls, and the shortest path back to the selling area.
Return and Sell Often
Convert materials into Cash before your storage fills. Frequent small trips beat one giant trip that ends with a full backpack and no room for better resources.
Buy Early Upgrades
Put your first earnings into mining power, movement options, and backpack capacity. These three reduce downtime more than any flashy late-game purchase.
Extend Your Route
With better equipment, push farther into the cave and target more valuable deposits. Upgrade before entering areas your current gear cannot mine efficiently.
Push Toward the Exit
Balance mining speed, storage, and transportation to sustain longer runs. Keep enough time and resources in reserve for the final escape sequence.
Avoid dumping all your currency into a single upgrade. A powerful pickaxe with a tiny backpack and slow movement still produces inefficient runs — keep your progression systems roughly in balance.
Class Picks and Upgrade Priorities
Class choice shapes how each run feels. Balanced roles suit learning, while specialized roles reward players who already know their routes. Use the tier overview below to pick a starting direction.
| Tier | Role | Strengths | Best For |
|---|---|---|---|
| S | Balanced Progression Miner | Reliable, supports mining and movement | Beginners, one flexible class for most runs |
| A | Resource Farming Miner | Strong repeated trips, fast currency | Funding upgrades quickly |
| A | Speed Miner | Less travel downtime, deeper access | Experienced players with known routes |
| B | Difficult-Run Specialist | Consistency and survival focus | Hard mode after a strong equipment base |
Upgrades follow the same logic: buy what removes your current bottleneck, not what looks most impressive.
| Upgrade | What It Does | Best Time to Buy | Value |
|---|---|---|---|
| Pickaxes | Faster rock breaking | When common rocks feel slow | High early game |
| Drills | Sustained mining power | Once income is stable | High mid game |
| Backpacks | More carrying capacity | Whenever packs fill mid-route | High consistent |
| Cars | Faster transport | When travel dominates run time | High for long runs |
| Dynamite | Clears stubborn obstacles | Situational, after core gear | Situational |
Pickaxe and backpack upgrades are almost always safe first purchases. Transportation shines later, and explosives should wait until your core equipment is already solid.
Gems and Cash Farming Strategy
Cash and Gems serve different purposes, and mixing them up slows progression. Cash funds everyday upgrades; Gems are rarer and belong in long-term purchases that stay useful across many runs.
| Currency | How to Earn | Best Use | Pitfall to Avoid |
|---|---|---|---|
| Cash | Consistent completed runs, moderate collection | Routine tools, storage, transport | Risky runs that fail before the exit |
| Gems | Rarer deposits and successful escapes | Premium progression unlocks | Spending immediately without comparing upgrades |
Mine While Advancing
- Collect resources along the main route
- Avoid long detours early
- Grab side deposits when clear
Safe Runs for Cash
- A completed run beats a greedy failure
- Repeat one reliable route
- Leave while the run is still profitable
Cooperative Farming
- Assign zones before entering
- Announce when moving deeper
- Regroup before risky sections
In co-op, split nearby resource areas instead of stacking on the same deposit. Complementary class roles and pet bonuses raise the value of the whole run.
Easy vs Hard Mode: When to Switch
Both modes share the same objective — advance, collect, escape — but Hard mode punishes weak preparation. Use Easy mode to build a currency reserve and route knowledge before committing to harder attempts.
| Category | Easy Mode | Hard Mode |
|---|---|---|
| Difficulty | Forgiving, good for practice | Demands timing and coordination |
| Rewards | Stable, consistent income | Better payoff, but failed runs waste time |
| Equipment | Basic gear is fine | Upgrade your weakest point first |
| Class Choice | Flexible, experimental | Complementary team roles |
| Preparation | Learn route and resource spots | Planned route, regroup point, right pets |
| Strategy | Test upgrades safely | Stay together, prioritize completion |
If your team regularly runs out of time, loses members, or fails to reach final sections, you are not ready. Farm Easy mode, upgrade, and return with a plan.
Before Your Next Escape Run:
- Backpack upgraded to fit the full route
- Mining power matches the deepest deposits
- Selling route memorized for quick returns
- Class and pet match the run objective
- Regroup point agreed before dangerous sections
Ending, Secrets, and FAQ
The main ending unlocks by following the primary tunnel route and completing the escape objective. Hidden Diamonds, secret areas, and optional characters sit off the direct path — treat them as separate exploration goals, not first-run requirements. A completionist approach works best across multiple dedicated runs: secure the ending first, then hunt Diamonds, then investigate branches and optional discoveries.
Run one: finish the main ending. Run two: collect nearby hidden Diamonds. Run three: explore unexplored branches. Final pass: confirm optional characters using the safest difficulty.
Q: What is the best first upgrade in Escape the Cave?
A stronger pickaxe is usually the clearest first investment because it speeds up every subsequent run. Follow it closely with a backpack upgrade to reduce return trips.
Q: Should I spend Gems as soon as I get them?
No. Gems are rarer than ordinary resources. Compare the next available upgrade against your current bottleneck and save Gems for purchases that stay useful across multiple runs.
Q: When should I try Hard mode?
Attempt Hard mode only after you can complete Easy runs consistently, your equipment covers your weakest progression point, and your team has a planned route with a regroup point.
Q: Do I need to explore every side path to finish this Escape the Cave guide's ending?
No. The main ending only requires following the primary tunnel and completing the escape. Side passages hide Diamonds and secrets, but they are optional objectives for completionists.