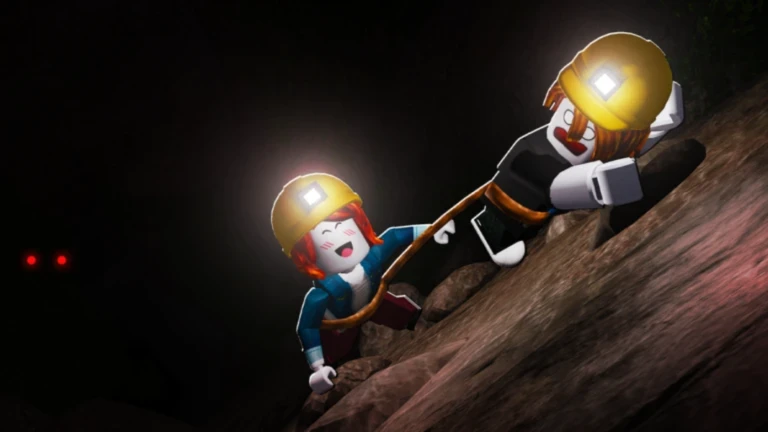
- Escape the Cave rewards efficient mining, selling, and reinvesting more than reckless speed.
- Backpack and pickaxe upgrades are the highest-value first purchases.
- Save Gems for upgrades that stay useful across many runs.
- Use Easy mode to learn routes, then attempt Hard mode with a plan.
- Coordinate roles in co-op so teammates don't mine the same deposits.
Core Gameplay Loop Tips
The core loop of Escape the Cave is mining rocks, selling resources, and buying upgrades that push you deeper toward the exit. Most failed runs happen when players skip one part of this cycle—mining far without selling, or hoarding currency without upgrading. These tips fix the most common loop mistakes.
Video Highlights:
- See the mining and escape loop in action
- Watch how resources are collected along the main route
- Observe how upgrades change run efficiency
| Loop Mistake | Why It Fails | Better Habit |
|---|---|---|
| Mining until backpack is full | Run stops dead until you walk back | Sell before storage maxes out |
| Skipping nearby deposits | Wastes free resources on your path | Mine visible deposits along the route |
| Saving all currency | Progression stalls, runs stay slow | Reinvest into your current bottleneck |
| One expensive upgrade | Leaves other systems behind | Balance mining, storage, and mobility |
Treat every run as a loop: mine nearby, sell regularly, upgrade the weakest part of your setup, then extend the route. This single habit improves income faster than any individual purchase.
Upgrade Priority: What to Buy First
Upgrades should reduce mining time, increase carrying capacity, or make longer trips efficient. Buy based on what is currently slowing you down, not on what is most expensive.
| Upgrade | Function | Best Time to Buy | Value |
|---|---|---|---|
| Pickaxe | Breaks rocks faster | Common rocks take too long to mine | ★★★★★ Early |
| Backpack | Carries more per trip | Backpack fills before route ends | ★★★★★ Always |
| Drill | Sustained mining power | After stable income; speed is the limit | ★★★★ Mid |
| Car | Faster travel | Travel time dominates each run | ★★★★ Long runs |
| Dynamite | Clears tough obstacles | Only when it saves major time | ★★ Situational |
Early Game
- Pickaxe first for faster mining
- Then backpack for fewer trips
- Skip explosives entirely
Mid Game
- Add a drill once income is stable
- Buy a car as routes get longer
- Focus on resources per trip
Late Game
- Specialize for Hard mode
- Use dynamite selectively
- Fix whichever system causes downtime
Do not spend all your currency on one flashy upgrade if it leaves your mining speed, storage, or movement behind. A balanced setup completes runs consistently; a lopsided one fails Hard mode attempts.
Gems and Cash Management Tricks
Cash is your everyday upgrade currency; Gems are rarer and should be saved for progression that pays off across many runs.
- Mine while advancing — collect deposits on the main route instead of making long detours.
- Use safe runs for Cash — a completed moderate run beats an ambitious attempt that fails early.
- Save Gems — compare the next upgrade against your current bottleneck before spending.
- Upgrade the bottleneck — one strong fix beats several small scattered purchases.
| Currency | Best Source | Best Use | Rule of Thumb |
|---|---|---|---|
| Cash | Consistent completed runs | Everyday equipment upgrades | Spend freely on bottleneck fixes |
| Gems | Rarer finds and runs | Premium long-term progression | Save until a clear payoff exists |
A repeatable route with moderate collection usually earns more over time than a risky deep run that ends before the exit. Consistency is the fastest path to currency.
Class Picks and Co-Op Coordination
Choosing Your Miner Class
| Tier | Role | Strengths | Best For |
|---|---|---|---|
| S | Balanced Progression | Mining + movement, reliable everywhere | Beginners learning routes |
| A | Resource Farming | Fast repeated trips, funds upgrades | Currency-focused players |
| A | Speed Miner | Cuts travel downtime, reaches deep areas | Players who know the routes |
| B | Difficult-Run Specialist | Survivability and consistency | Prepared Hard mode teams |
Co-Op Tricks
- Assign roles before entering so players cover different resource areas.
- Announce when moving deeper and regroup before risky sections.
- Avoid overlapping bonuses — complementary pets and classes improve the whole run, duplicates waste them.
- Solo players should favor all-purpose setups since one character handles everything.
In groups, have one player lean toward mining, one toward collection, and one toward mobility or safety. Specialized roles consistently outperform five identical loadouts.
Hard Mode Preparation Walkthrough
Hard mode shares the same objective but punishes inefficient routes and poor preparation. Treat every Hard attempt as a planned expedition.
Learn the Route in Easy Mode
Use Easy runs to memorize the tunnel, resource locations, and the path back to the exit. Consistent Easy completions build your upgrade budget safely.
Fix Your Weakest System
Upgrade whatever fails most often: mining speed if runs stall, movement if travel dominates, storage if you return half-empty.
Plan the Expedition
Enter Hard mode with a planned route, a regroup point, suitable pets, and the experience to know when to retreat.
Prioritize Completion
Stay together in dangerous sections, limit detours, and reach the exit over grabbing marginal extra resources. Repeated completions beat one greedy failure.
If your team regularly runs out of time, loses members, or cannot reach the final sections, you are not ready. Return to Easy mode, upgrade, and try again with a stronger setup.
Run Checklist and Ending Tips
Before Every Deep Run:
- Backpack upgraded and empty
- Pickaxe or drill matches route difficulty
- Transportation ready for the return trip
- Regroup point agreed with teammates
- Gems saved for a planned upgrade, not impulse spending
For the ending and secrets, secure the main escape first, then use dedicated exploration runs for hidden Diamonds and secret areas instead of risking your first completion. Record discovered locations so future farming routes get faster.
Run one: complete the ending. Run two: grab nearby hidden Diamonds. Run three: explore secret branches. Final pass: confirm optional characters and discoveries in the safest difficulty available.
FAQ
Q: What is the best first upgrade in Escape the Cave?
A stronger pickaxe is usually the clearest first investment because it speeds up every mining action. Follow it with a larger backpack so you carry more per trip and reduce return visits.
Q: Should I spend Gems as soon as I get them?
No. Gems are less common than mineable resources. Compare the next available upgrade with your current bottleneck and save Gems for progression that stays useful across multiple runs.
Q: When should I attempt Hard mode?
Attempt Hard mode after you can complete Easy runs consistently, your equipment addresses your weakest system, and your team has a planned route with a regroup point. Failed Hard runs reduce farming efficiency.
Q: How do I find hidden Diamonds and secret areas?
Search side passages after the main route is secure, check openings that look accessible but easy to overlook, and use dedicated exploration runs rather than risking your first escape attempt.