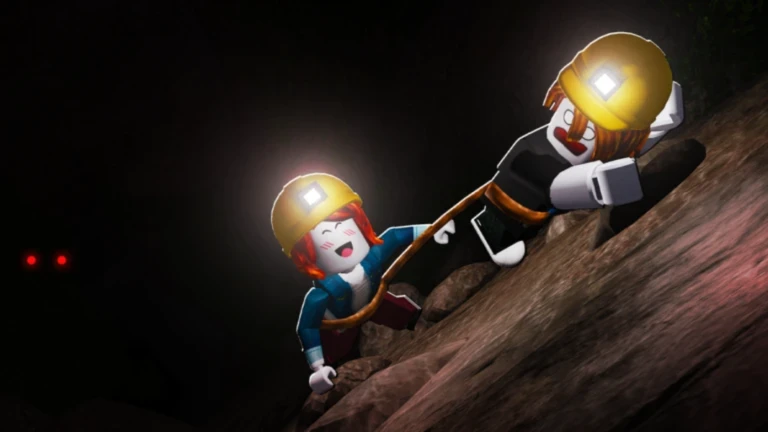
- How to play Escape the Cave: Mine rocks, sell resources, buy upgrades, and push toward the exit
- Core loop: Every run follows the same rhythm — collect, return, sell, reinvest
- Early priority: Upgrade your pickaxe and backpack before anything else
- Currency rule: Treat Cash as daily spending money and save Gems for long-term upgrades
- Difficulty tip: Learn routes in Easy mode before attempting Hard mode runs
Escape the Cave How to Play: The Basics
Escape the Cave how to play starts with one simple objective: descend into a dark tunnel, break rocks, collect valuable resources, and work your way toward the exit. The game is built around a repeatable progression loop rather than a one-time course. Each expedition earns you currency, and each upgrade makes the next expedition faster, safer, and more profitable.
The core systems break down into four pillars:
- Mining: Break rocks with your pickaxe to collect resources
- Selling: Return to the selling area to convert materials into Cash
- Upgrading: Reinvest earnings into tools, storage, and vehicles
- Escaping: Advance deeper into the tunnel to reach the main ending
| System | What It Does | Why It Matters |
|---|---|---|
| Mining | Breaks rocks, collects resources | The source of all income |
| Selling | Converts materials to Cash | Frees backpack space |
| Upgrades | Improves speed, capacity, travel | Compounds run efficiency |
| Escape | Reaching the tunnel's end | Unlocks the main ending |
New players should stay near the entrance for the first few runs. Learning the closest deposit locations and the route back to the seller matters more than how much you collect on day one.
The Core Gameplay Loop Step-by-Step
Follow this five-step cycle every session. It forms the backbone of all progression in Escape the Cave.
Start Mining Rocks
Use your starting equipment to break nearby rocks and collect resources. Prioritize deposits close to the entrance so you can learn the mining area without wasting travel time.
Return and Sell Resources
Bring your materials back to the selling area and convert them into currency. Selling regularly prevents a full backpack from stalling your next trip.
Buy Early Upgrades
Reinvest earnings into mining power, storage, and movement. Upgrades that reduce downtime and increase carrying capacity deliver the best early returns.
Extend Your Route
Once your equipment improves, travel farther into the cave and target more valuable or harder-to-mine resources.
Progress Toward the Exit
Balance mining speed, storage, and transportation as you advance. Avoid dumping all currency into a single upgrade while other systems fall behind.
Do not push into deep areas with starter equipment. If common rocks take too long to break, your run loses money to wasted time. Upgrade first, explore second.
Tools and Upgrades: What to Buy First
Upgrades should always target your current bottleneck — the part of the run that wastes the most time. Use this priority table to decide where your Cash goes next.
| Upgrade | Function | Best Time to Buy | Value |
|---|---|---|---|
| Pickaxes | Faster rock breaking | Common rocks feel slow | ★★★★★ Early |
| Backpacks | More carrying capacity | Backpack fills mid-route | ★★★★★ Always |
| Drills | Sustained mining power | Income is stable, speed is the limit | ★★★★ Mid-game |
| Cars | Faster travel | Travel dominates run time | ★★★★ Longer runs |
| Dynamite | Clears tough obstacles | Explosives save real time | ★★ Situational |
Early Game Build
- Pickaxe upgrade first
- Follow with a larger backpack
- Stay on short, safe routes
Mid Game Build
- Drill for sustained mining
- Car for deeper travel
- Balanced mining and storage
Late Game Build
- Top-tier mobility
- Target deep, valuable deposits
- Prepare for Hard mode runs
Before every purchase, ask one question: what is slowing my run down the most right now? Buy the fix for that problem, not the most expensive item on the shelf.
Gems, Cash, and Classes
Cash is your everyday currency — earned through consistent, completed runs and spent on regular upgrades. Gems are rarer and should be saved for unlocks that stay useful across many expeditions. Never spend Gems the moment you earn them; compare the next upgrade against your current bottleneck first.
| Currency | Best Source | Best Use | Spending Rule |
|---|---|---|---|
| Cash | Completed runs, resource sales | Pickaxes, backpacks, cars | Reinvest constantly |
| Gems | Rare collection, hidden finds | Long-term progression unlocks | Save for high-impact buys |
Class choice follows the same logic. Pick a balanced progression miner while you are still learning routes, then specialize once you understand your preferred playstyle.
| Role | Strength | Best For |
|---|---|---|
| Balanced Miner (S) | Flexible mining and movement | Beginners, general progression |
| Farming Miner (A) | High resource collection | Building currency quickly |
| Speed Miner (A) | Reduced travel downtime | Players who know efficient routes |
| Hard-Run Specialist (B) | Consistency on tough attempts | Experienced, well-equipped players |
In group runs, assign roles before entering. Split nearby resource areas, announce when moving deeper, and regroup before risky sections so the whole team profits.
Easy vs Hard Mode and Reaching the Ending
Both modes share the same goal: advance through the cave, collect resources, and escape. Easy mode is forgiving and ideal for learning map flow and testing upgrades. Hard mode punishes poor planning but rewards prepared teams.
| Factor | Easy Mode | Hard Mode |
|---|---|---|
| Difficulty | Forgiving, good for practice | Demanding timing and coordination |
| Rewards | Stable, dependable income | Higher value, but failed runs cost efficiency |
| Equipment | Basic gear is fine | Upgrade your weakest link first |
| Strategy | Collect, experiment, learn | Planned routes, regroup points, completion first |
To reach the main ending, follow the primary tunnel route, keep enough time and resources for the final escape sequence, and prioritize completion over optional exploration. Hidden Diamonds, secret areas, and optional characters are best saved for dedicated exploration runs after your first successful escape.
First Session Goals:
- Complete one full mining-and-selling cycle
- Buy your first pickaxe upgrade
- Learn the route back to the seller
- Complete one successful escape run
- Save your first Gems for a planned purchase
Do not try to find everything in one high-risk run. Complete the ending first, then run the cave again specifically for hidden Diamonds and secret areas on the safest available difficulty.
FAQ
Q: How do I play Escape the Cave as a beginner?
Start near the entrance, mine the closest rocks, sell before your backpack fills, and reinvest in a pickaxe and backpack first. Extend your route only after your equipment improves.
Q: What should I upgrade first in Escape the Cave?
A stronger pickaxe is usually the clearest first investment because it speeds up every run. Follow it with backpack capacity to reduce return trips, then add drills and cars as your routes get longer.
Q: Should I spend Gems right away?
No. Gems are less common than mined resources and should be reserved for upgrades that stay useful across multiple runs. Compare the next unlock against your current bottleneck before spending.
Q: When should I try Hard mode?
Attempt Hard mode only after you know the route, have upgraded equipment covering your weakest point, and can complete Easy runs consistently. Treat every Hard attempt as a planned expedition, not an improvised farm.